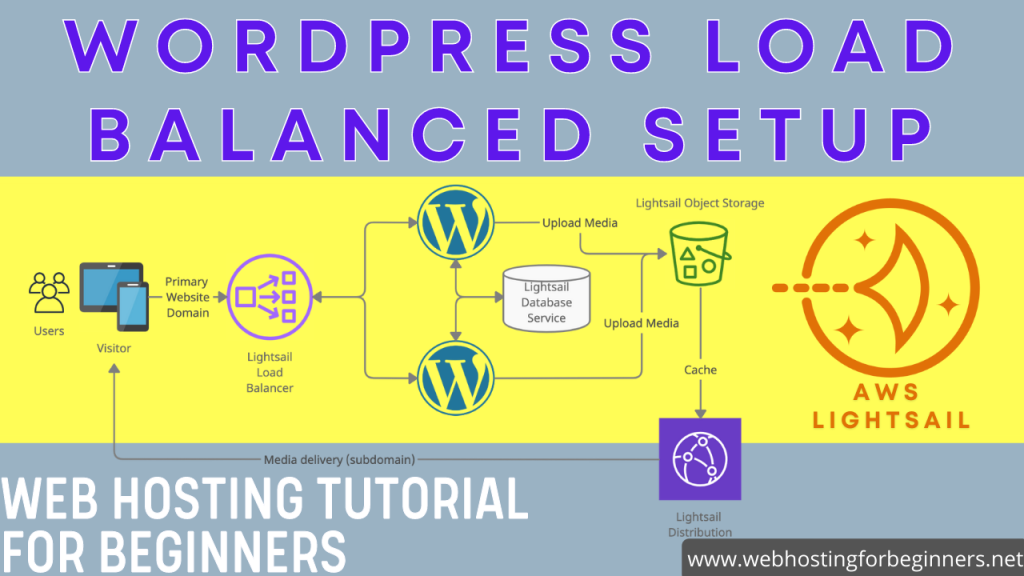
Recently AWS Lightsail introduced the ability to setup Content delivery Distributions within the LightSail Dashboard. This basically runs on AWS #CloudFront Content Delivery Network but they have taken all the complexity away for LightSail users. So in this week’s video I will show you how to setup your LightSail instance to take advantage of this new feature.
Video Index:
00:00 - Intro
01:55 - Install WordPress LightSail Instance
02:30 - Setup Static IP Address
02:49 - Create LightSail Content Distribution
03:00 - Configure Distribution Settings
07:17 - Distribution Settings / Origin Protocol Policy
09:23 - Review Cache Settings and Options
10:25 - Configure AWS SSL Certificate
11:11 - Validate Domain Ownership (DNS Validation)
13:17 - Enable Custom Domain and make DNS changes
15:34 - Verify DNS changes
15:53 - Apply SSL/TLS termination to wp-config (code snippet)
17:17 - Verify your Distribution is working
Code snippet needed to for wp-config.php change:
define('WP_SITEURL', 'https://' . $_SERVER['HTTP_HOST'] . '/');
define('WP_HOME', 'https://' . $_SERVER['HTTP_HOST'] . '/');
if (isset($_SERVER['HTTP_CLOUDFRONT_FORWARDED_PROTO'])
&& $_SERVER['HTTP_CLOUDFRONT_FORWARDED_PROTO'] === 'https') {
$_SERVER['HTTPS'] = 'on';
}
My preferred Domain Registrars:
- Name.com
- Google Domains
More information on Lightsail CDN and other documentation. Image courtesy of AWS Lightsail Documentation
All videos tutorials on the website as well as the YouTube channel aim to provide a simplified process for a specific scenario; there could be many different factors and unique use cases you may have. The tutorials may not cover every situation; so treat is as a starting point or learning concept to apply to your unique situations, and consider this inspiration but not prescription or explicit direction.


